
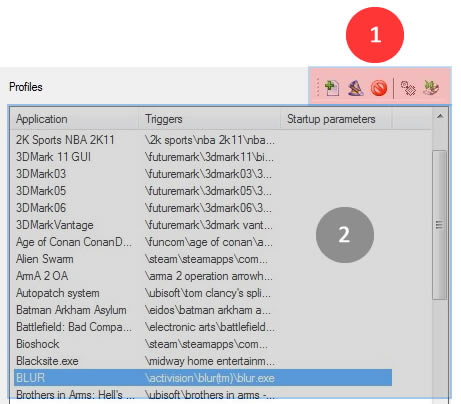
The program interface is quite simple, you have a small toolbar (1) with some icons and below it you can find the profiles list (2), occupying almost all of the left side of the window.
On the toolbar, from left to right, you have buttons to add a new profile, create a new profile using the Agent Ruby Wizard, delete the selected profile, open the program settings dialog and a button to open the Backup/Restore feature.
The right side of the window shows a few items on the top, as you can see below:

- Global scope selector
Click it to select the Global profile. Click it again to change its state to unpressed to avoid changes to the global profile settings.
The Global profile stores the settings you want to have every time a game (with a profile defined for it) is finished. While having the Global scope selector selected, changes made to the settings are not automatically saved. To save your Global profile changes, click the Save changes link that will appear next to game title, on bottom of window (see image below). - Profile scope selector
This button changes to pressed state whenever you have a selected item on profiles list. All changes made to the settings are automatically saved as you change them. - Reset defaults
Click the link to set the default values for each setting. - Settings Tabs
Each tab groups a lot of settings, but don’t worry, you will learn about each tab and its settings as you advance through this user’s guide.
Current profile settings section
The bottom of the screen shows the current settings for the selected scope (Global or Profile).

- Profile name
Shows the profile name (usually the game title) or Global when the Global scope is active. You can rename profile items by right-clicking an item and choosing Edit option on context menu, or by pressing F2. - Current settings
Lists all settings for the currently active scope (Global or Profile). Some settings are not applicable to Global profiles and are blocked (disabled) for your convenience. - ATI/AMD Radeon Graphics logo
Click the logo to open the Hardware information dialog, that shows information about the installed graphics hardware.
The logo changes accordingly to the main display adapter, if you have an HD 6800 or HD 6900 series card installed, the AMD Radeon logo will be displayed instead of the standard ATI Radeon logo.
Ok, now that you have learned about the basics of the program’s user interface, let’s learn what is a profile and how to create one!